Share
Pin
Tweet
Send
Share
Send
To work, you will need:
- color two-sided paper of two or more colors;
- scissors;
- glue (any will do);
- decorative elements. In my work I used beads, floral tape and wire for the trunk, some gypsum for the “soil”, a container where a tree and moss will be planted.
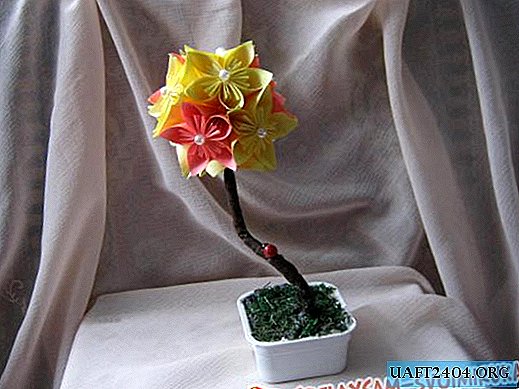
With the preparations we have finished, we can begin to create a charms called "flower kusudama." In some sources, this kusudama is called "Morning Dew" or "Morningdew". But no matter how it is called, I’ll say that it just hit me on the spot, and I really wanted to make it. But we got loose, get to work.
Work Stages:
1 The first thing we need is to determine the size of the kusudama. I took 6x6 cm squares. As a result, I got a ball of about 8 cm, consisting of 12 flowers.
Each kusudama consists of modules and flower kusudama is no exception. One petal is one module, from which one large module is then formed.
Schematically, the assembly of kusudama is as follows.

But in practice it looks like this:
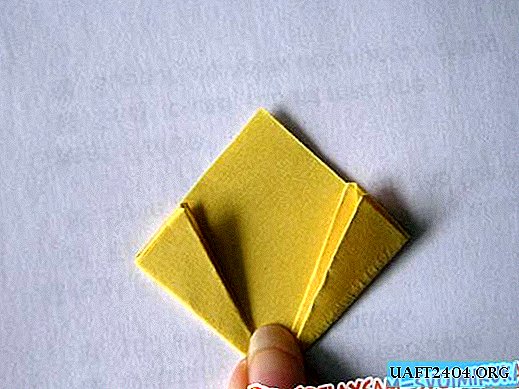
We take a square and fold it diagonally 1 time, if this is done twice, then when we form the petal module, a scar will be visible. The fold line should be down.


Now we take one side and bend toward the center, repeat the same thing on the other side. In the process, make sure that all the ends coincide, this is important, because in the future it will be seen that the paper is “folded”. As a result, we should get this:


Next, take one side, straighten it and fold it in half to the fold line. We repeat the same thing on the other hand. As a result, we should get something like a shamrock.


At the next stage, we run the finger into the resulting triangle and straighten it. We repeat the same thing on the other hand.

As a result, we should get such a "broadleaf trefoil."

Next, we bend the "protruding" triangle inward, as if to ourselves. We do the same on the other hand.


As a result, we have triangles on both sides. On the fold line, fold them again inward.
We can say that one module is almost ready, it remains to carefully connect the sides and we get one petal with small rays.


For one complete module, we need five petals, but in reality they can be less, or vice versa, more. Here, as they say, a matter of taste and desire. Gently glue the petals together, form a beautiful smooth flower. If the middle is uneven, it can always be "hidden" under a bead, button or any other decorative element.
When all the flower modules are ready, we proceed to the formation of the ball. We glue together the modules for the petals.


While the finished ball dries, proceed to the manufacture of a tree trunk. To do this, take the wire, preferably thicker. Next, I wrapped the wire with a newspaper tube so that the trunk was thick. It is not necessary to wind the trunk evenly, one might even say a little carelessly, this will make the trunk as close as possible to the present. In the right places fixed with glue. Next, wrap the trunk with a brown floral tape. Bend one end of the wire so that when “planting” the tree cannot be pulled out. If desired, the trunk can be left flat, or you can make a bend. In the bead-free flower, we insert the trunk and plant plaster of sour cream, plaster, we fill in the form and "plant" the tree. Once the gypsum has hardened, you can paint it “underground” and in some places grease it with glue, sprinkle with moss and let the whole composition dry well.


Share
Pin
Tweet
Send
Share
Send