Share
Pin
Tweet
Send
Share
Send
After the car repair, worn-out parts and assemblies that are unsuitable for direct use remain, but which are of some value, both with their material and residual functionality.
In this regard, the ball joint of the front suspension of a car made of high-quality steel, and retaining mobility in the joint, is no exception. If you have no idea how to use it in the future, then you can look at various sources and find a suitable and useful option for you.

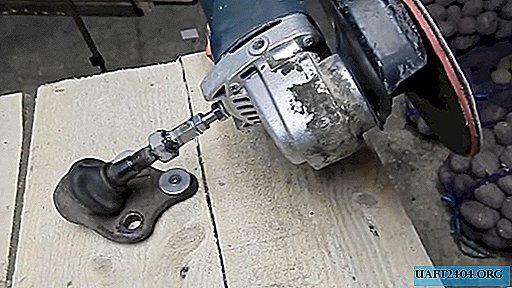
Now we will consider the possibility of using the old worn ball joint as a movable bracket with three degrees of freedom for mounting the grinder. What do we need to have available for this?
Would need
We will need quite a bit of the most common tools, materials and devices:
- bench vise;
- welding machine;
- Angle grinder;
- hammer;
- ring spanners;
- hexagon adapter with internal thread;
- a bolt or stud, washers (flat and engraving) and nuts;
- drill with a drill and a cross-shaped bat;
- screws with wide washers.
Making a convenient bracket
1. Clamp the ball bearing in a vise, screw the "native" nut onto the thread if it remains intact, or we select a similar one. We weld a nut on the finger with a welding machine, so that a solid one-piece connection is obtained. To do this, hammer the welding seam with a hammer to remove scale, and if necessary, re-weld the weakened places.


2. Then we take a six-sided adapter with an internal thread, the external size of which is comparable to the threaded hole in the nut. We weld it to the nut, holding on to the rod screwed into the adapter.


3. Next, clamp the pin or bolt in a vice and shorten it from the side of the head with the help of a grinder to the required length, leaving a section with a thread on one end that is the same size as the internal thread of the adapter.

4. We fix the modernized ball joint on the surface of the workbench in a place that will be convenient for future work with the grinder, taking into account the extension of the bracket and the weight of the grinder.

To do this, using the mounting holes of the ball joint as a marking, we drill through the base with a drill and a drill that is suitable in diameter and length.
Using the same drill and a cross-shaped bit, we screw the screws with wide washers into the wooden base of the workbench, focusing on the previously drilled holes, and the corresponding location of the almost finished bracket.
We check the strength of fixing the ball joint on the surface of the workbench and, if necessary, tighten the screws until the desired result is achieved.
5. Turn the threaded rod into the adapter on top, on which two engraving washers and nuts are placed in advance.
6. Now it remains to screw the rod into the threaded hole on the back of the grinder housing, where the handle was previously, and tighten the nuts securely with the appropriate ring spanner.


Such a mounting of the grinder frees hands and allows you to position the tool in any position that will be most convenient for performing a particular operation when working with metal and other materials.


It may happen that the weight of the grinder will exceed the frictional force in the ball joint, especially if it is very worn. In this case, the expected result - fixing the tool in the required position - cannot be achieved.
But this fundamental problem is easily eliminated. The simplest option: you should turn the ball bearing over and several times deliberately hit the body with a hammer, causing it to deform. As a result, it will more tightly compress the ball of the finger and increase the friction force in the joint.


Another version of improving the performance of our homemade bracket is technically more competent. It is necessary to drill the bottom of the ball joint housing, cut the thread in it and screw in a suitable bolt. With it, you can adjust the frictional force in the bracket and even fix it in the right position.

Watch the detailed video
Share
Pin
Tweet
Send
Share
Send

