Share
Pin
Tweet
Send
Share
Send
* Two binding blanks measuring 15 * 15 cm;
* Fabric in mint green with flowers, 100% cotton;
* Sintepon;
* Glue "Scotch effect";
* Paper napkin felling from a thick cardboard of white color;
* Mint hollow heart with a mint color;
* Satin ribbon 25 mm wide mint color;
* Picture with the newlyweds;
* White fabric flower;
* Chiffon roses on a white ribbon;
* Mint cotton lace 35 mm wide;
* Stamp "Happy Wedding Day", green ink;
* Mint color scrapbook paper, sheet 30 * 30 cm;
* Cutting down champagne and beige glasses;
* Mint large poppy;
* White latex and mint light roses;
* Brads metal with a brilliant stone;
* Hole puncher;
* White cardboard;
* Glue stick;
* Semi-pearl small beige color with a diameter of 3 mm;
* Scissors, double-sided tape, ruler, pencil, thermal gun.

First of all, you need to connect the blanks of binding cardboard to each other. To do this, we need to cut off a strip of white cardboard or watercolor paper 5.5 * 15 cm in size. We divide this blank into three parts 2.5 * 0.5 * 2.5 cm. We draw bending lines under the ruler.


Now on both sides we smear with glue stick and glue on both binding blanks. It is good to press and level, and then still gently hold the scissors between the workpieces.


With strips of double-sided tape, now we need to glue the synthetic winterizer on the entire solid piece. Now we take the fabric, put the prepared cover on it and apply it. From all sides you need to make a margin of 1.5-2 cm around the perimeter.


We smooth the fabric.


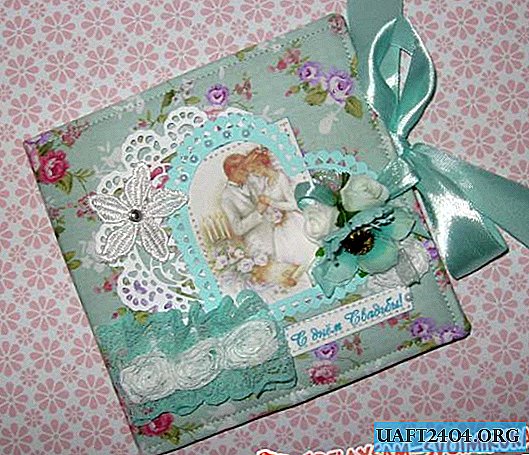
Fold the blank in half and glue a tissue onto the fabric, tint the edges of the picture and inscription. We also glue them on a napkin and below the napkin.


Sew them on a typewriter. We insert the brads into the flower.


Now put the front part of the fabric on the table, lay out the soft cover and wrap the fabric inward. Spread with glue stick and glue. Better to start from the corners.


Sew along the edge of the entire cover. Now we make out the cover inside. To do this, take a scrapbook paper.


We cut out two squares of 14.7 * 14.7 cm and cut out 8 * 14.7 cm for pockets. We pass pockets on one side with a hole punch. We glue the pockets on the squares and sew both squares along the edge.


Now glue the partition from the scrapbook paper inside the cover, then glue both squares with adhesive with the effect of adhesive tape. We lay the blank in expanded form under the press so that the cover snuggles well and fixes. After the cover has dried, we can only stick the decor.


The result is such a beautiful and delicate envelope for wedding discs. By the way, it can be used by guests as an envelope for money, and the newlyweds will use it for its intended purpose. Thanks for your attention!


Share
Pin
Tweet
Send
Share
Send

