Share
Pin
Tweet
Send
Share
Send
For the master class of such a card you need to take:
• Red cardboard of A4 format;
• Scrapbooking paper in three shades;
• Picture of a bear with hearts;
• Printed inscriptions;
• Big and medium cut red hearts from cardboard;
• Curb hole punch with lace;
• Cut down butterfly of red color;
• Stamen branches of red and burgundy color;
• Pearl beads on a fishing line;
• Red heart made of polymer clay;
• Small red chrysanthemums and a plastic lock;
• Red poppy, berry and complex stamens are also red;
• Satin ribbons red narrow with polka dots and wide white in red hearts;
• Red carved bow;
• The cord is red and white;
• Beige half beads;
• The inscription stamped "With love";
• Ink pink pillow;
• PVA glue, double-sided tape, glue gun;
• Ruler, pencil, scissors.
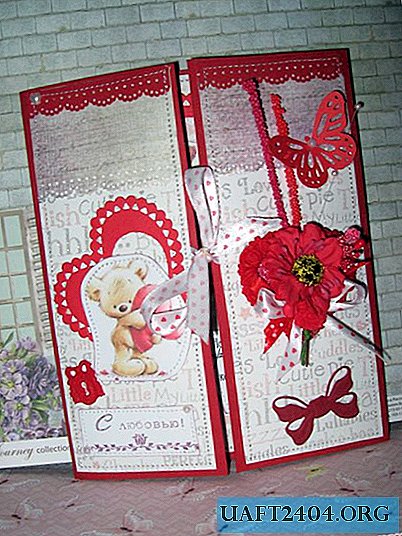

The card will have an opening form, in the form of a gate, so first cut out the base of the cardboard, namely, first cut out a rectangle of 18 * 30 cm. Divide it into parts of 7.5 * 15 * 7.5 cm, draw bends and fold it.


We get this form. Immediately cut strips of ribbons so that the finished card would be tied to a bow. Cut the stripes into hearts 12 cm long and glue it on the tape in the middle.


We will now draw up.


From different scrapbook paper we cut out such sizes here.


We make the smallest ones lace, we also make lace from red cardboard, as well as from other residues.


Glue PVA, glue all the strips and connect the rectangles 6.7 * 17.5 cm. Pictures with the inscriptions we tint on the edges with a pillow.


We glue the inscriptions and pictures to the scrapbook paper, sew each on a typewriter. Now all the individual parts are glued to the base.


Sew on a typewriter on the outside of the side, and on the inside the middle.


Now just glue the decor, as in the photo. The scenery is all with a glue gun.


We knit on a bow and get just such a bright postcard for your beloved. Thanks for your attention!


Share
Pin
Tweet
Send
Share
Send